
Thank you to everybody for the lovely reactions to my previous post about My Visual Impairment Aids & Gadgets, especially after the RNIB kindly shared it on Facebook and Twitter, where it got a particularly big response. I’m very glad it’s proven so useful, and it’s been great to see other people sharing what they use as a result.
So this post and video is a follow-up to that, looking at the accessibility features and favourite apps I use on my iPhone. I’m not sponsored by anyone to do this or affiliated with any companies mentioned here, I just wanted to share the things that I use and enjoy. So I hope you find this post interesting, and feel free to share the features and apps that you use too.
Contents
My iPhone
I currently have an iPhone 6 running iOS 11. I’ve had the phone for a few years now, and it’s been my first ever smartphone. Prior to that I had a classic old Nokia phone, which lasted me for ages, but when it eventually started breaking down, I finally made the upgrade.
And I love my iPhone. I basically have a small computer in my pocket that does so much to make my life a lot easier and more accessible, and gives me access to lots of information and entertainment. And it happens to make phonecalls on the side too – these days that almost feels like an extra rather than the main feature for many people!
I also have a battery case for it, because it’s easy to run the battery down when you’re using the phone intensively for filming, taking photos, listening to music or books, etc. It’s the Wesoo 2500mAh Ultra Slim Portable Charging Case, which I got from Amazon and no longer seems to be available. But there are lots of other battery cases out there.
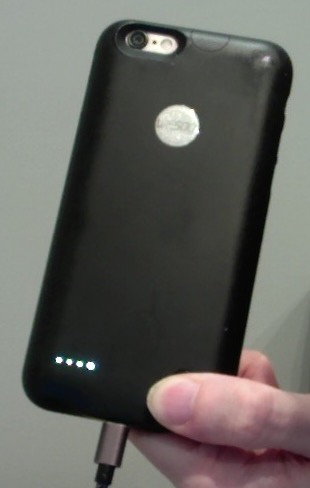
But I’m happy with my one, it works very simply and effectively. I can just press a button the back to see how much battery is let in the case, represented by 4 lights, and then I can hold the button down for a few seconds to start charging the phone off it. The case is plugged into the charging port at the bottom of the phone, and then has its own charging port on the same outer edge, so that you can keep the phone in the case when you plug it into your computer or mains power.
I have nothing against Android by the way, which regularly comes up in comparison to Apple’s iOS system, because I have no experience to comment on Android. When I was choosing a new phone in the store, I did have a little play with an Android device, and it seemed alright. And I’m sure I would have done fine if I’d gone down that route. But the iPhone just seemed to have a nicer interface and felt more accessible.
Plus, after my Windows PC had died a couple of years previously, I’d upgraded to an iMac, because I use Macs at work and already had experience with them. So getting an iPhone to connect with it was naturally a big draw. But if you prefer Android or some other smartphone system, because you feel it works best for you, then that’s fantastic.
In any case, many features and apps are identical or very similar on different types of smartphone anyway, so a lot of what I talk about here won’t just apply to the iPhone.
Accessibility Features
It’s wonderful that iPhones have so many accessibility features built in, and that they’re constantly evolving and improving as Apple updates the operating system. It ensures that people who are visually impaired, hard of hearing, or who have limited motor skills, can still use the device and aren’t left out.
But also, many of the accessibility features can be useful for non-disabled people as well to be honest. They just don’t know they’re there, because they don’t think of looking for them.
So whether you have a disability or not, it’s well worth going into Settings / General / Accessibility and having a look around, because you might be surprised by what you find.
So here are the features that I personally use. Most of these features, or ones that are similar to them, are on other Apple devices too (iMacs, Macbooks, iPads, etc), so I use some of them on my iMac as well as my iPhone.
Invert Colours
(Settings > General > Accessibility > Display Accommodations)
Aniridia, one of my eye conditions, makes me more sensitive to glare. And the white backgrounds on computer screens generate a lot of that. Turning the brightness or contrast down isn’t enough, because then it’s just harder to read everything in general. So instead, I use the Invert Colours option to switch to a negative view – i.e. white text on a black background. It makes things much easier to see and a lot less tiring on the eyes.
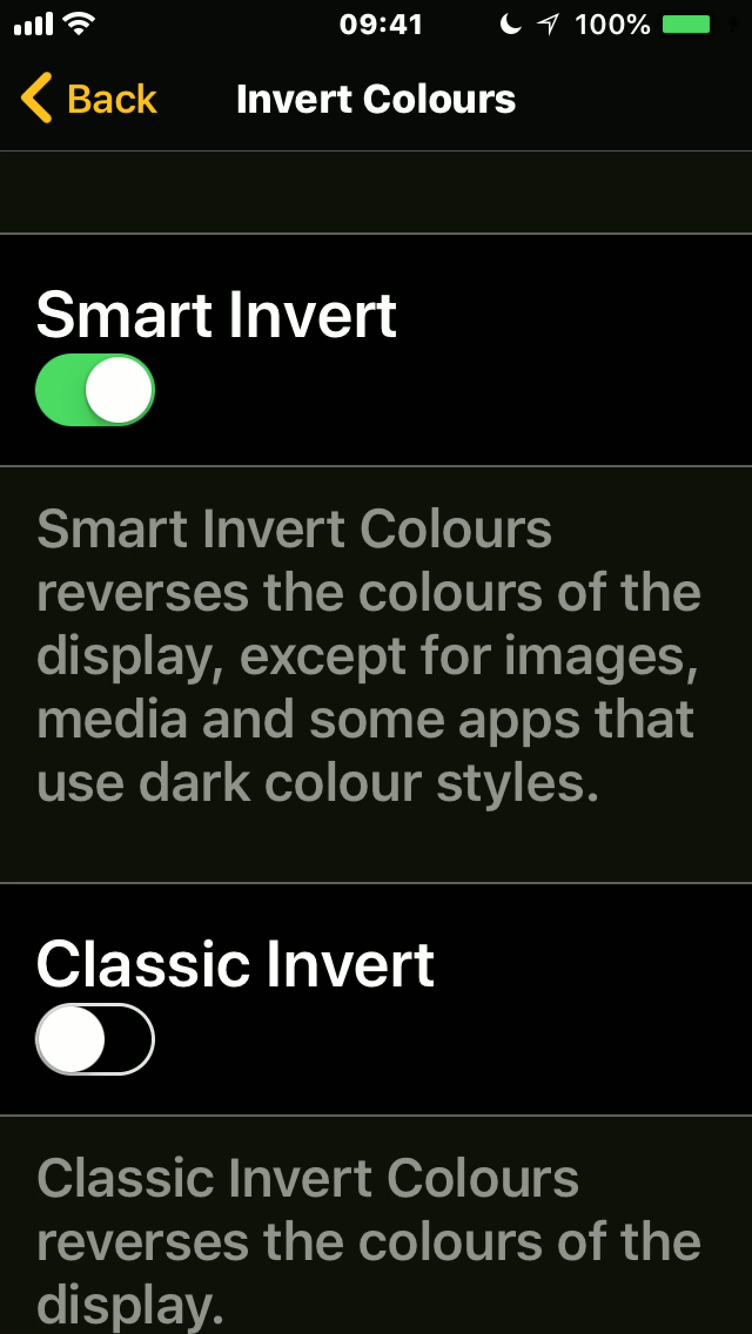
In the past, this option has turned everything negative, including pictures and videos. And that’s what the Classic Invert option still does. In this case, you have to flip back and forth between the negative and standard views if you want to view media like photos and movie clips. And that is easy enough to do by triple-clicking the Home button, which brings up an Accessibility Shortcuts menu to quickly turn things on or off.
Recently, however, Apple have added a Smart Invert feature, which turns the text and background negative, but keeps photos and videos the correct way around. It’s also been added to the desktop operating system on my iMac as well, which is great. So it’s a really useful update.
Smart Invert doesn’t work everywhere though, admittedly. There are some apps where it partially works (e.g. Instagram photos but not videos), and others where it doesn’t work at all. Or if an app is designed with a dark background, then inverting the colours will naturally make it bright again. So I still have to switch back and forth sometimes. But I don’t have to do it as often as I used to, and hopefully Apple will continue to refine the feature as they go along.
Magnifier
(Settings > General > Accessibility > Magnifier)
Turning on this option adds the Magnifier to the triple-click home button shortcut menu. I’ve also made it available in the Control Center, which you get when you swipe up from the bottom of the screen.
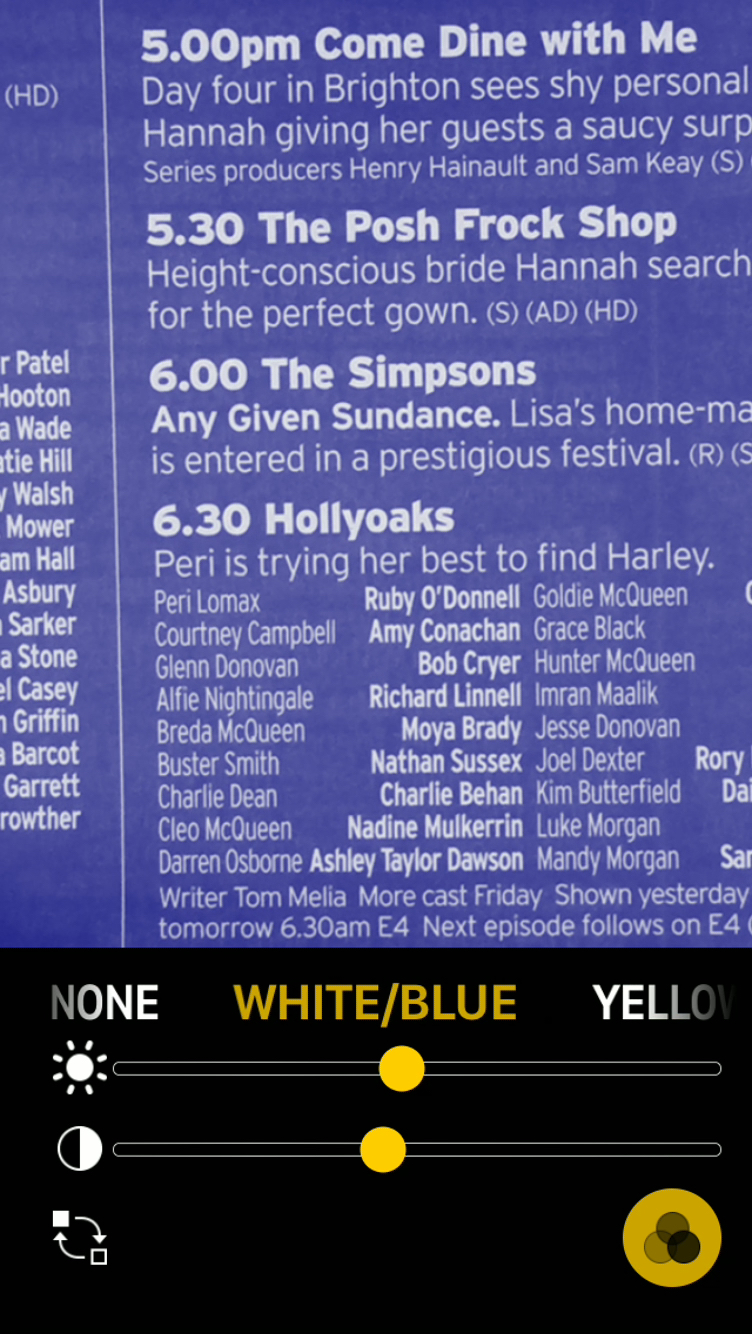
Magnifier is basically a special camera app that allows you to zoom in on things to check them out more closely. And the zoom here is much more powerful than the standard Camera app.
It also has various additional options. You can turn your camera’s light on, lock the focus, freeze the image on screen so that you don’t have to keep holding your phone up to something, adjust the brightness and contrast levels, invert the colours, and select from a range of other colour combinations to make things easier to read. So it’s a really versatile and useful app, but it’s rather hidden if you don’t know it’s there.
Zoom
(Settings > General > Accessibility >Zoom)
With this option activated, I can zoom in on the contents of the screen if I want to, by double-tapping with 3 fingers. And I can then drag 3 fingers around to look at different parts of the display. And to change the magnification level, I double-tap with 3 fingers as before, but instead of removing my fingers I keep them there and drag up and down.
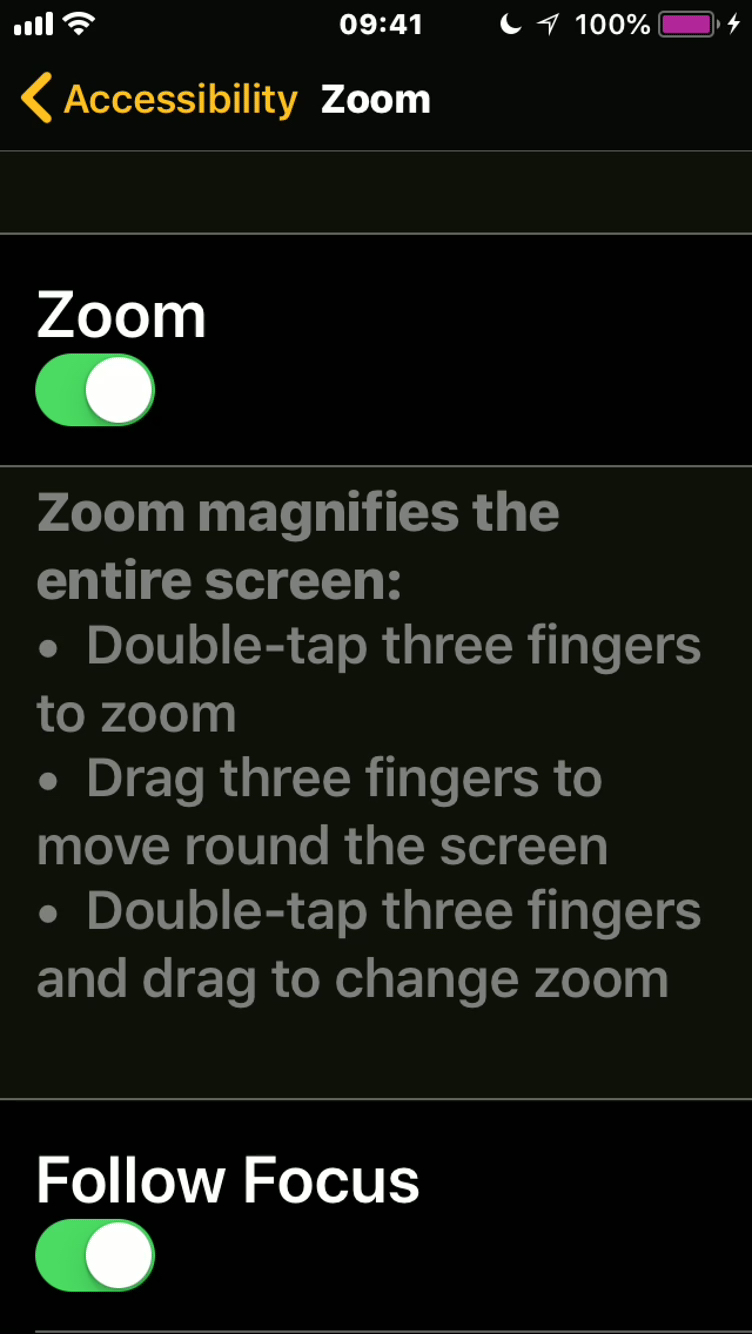
You can also triple-tap with 3 fingers to bring up a menu for changing various options. And when a keyboard appears on the screen, the Zoom feature will adjust to ensure you can always see what you’re typing. So the gestures are all very simple, and there’s plenty you can do with this feature.
Update – Emma from Rock For Disability has noted a couple of important additions in the comments that are worth highlighting at this point:
I think it should be good to mention the Controller on zoom. I use it because I cannot use three fingers to scroll. If you go to Accessibility > Zoom > Show Controller then a circle with a dot and four arrows will appear that you can control around the screen. Plus if you press it, it will come up with menu options to zoom in/out, full screen or window view, choose filters, hide controller and change the zoom level.
Another accessibility feature which is also good to mention is Assistive Touch (Settings > Accessibility > AssistiveTouch). It helps people who can’t access the physical phone buttons and instead do it on a menu on the screen (e.g. home button, volume, lock screen).
Thank you Emma for the valuable input!
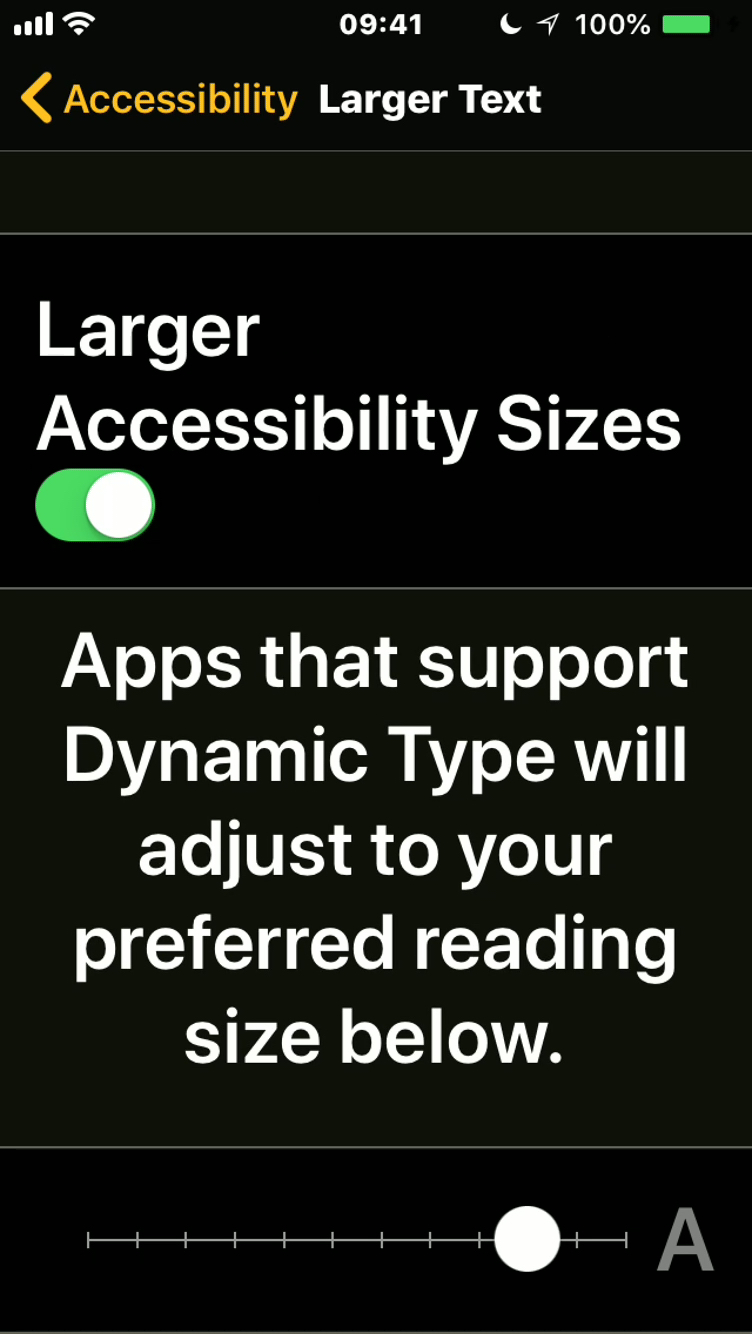
Larger Text
(Settings > General > Accessibility > Larger Text)
As the name suggests, this allows me to set a particular text size, which is then used by apps that support the Dynamic Type feature. Not all apps do support it, but it’s useful for those that do.
Mind you, when an app does use it, it’s not always perfect. The Wetherspoon app, in which you order food and drink from their pubs, has an accessibility fail early on because of this. It asks you to confirm where you are, with text and a map – but with large text turned on, the Confirm button disappears off the bottom of the screen and you can’t scroll to it!
So to click Confirm, we had to back out of the app, go into our Settings, change the text size temporarily and then go back in again. Not ideal at all. Shame though, as it’s a good app otherwise, and our food and drink came very quickly once we were able to get in and order it.
So it’s great when app developers incorporate the Dynamic Type option, but they need to be careful that it doesn’t make things more difficult in the process.
Increase Contrast & Bold Text
(Settings > General > Accessibility > Increase Contrast > Reduce Transparency & Darken Colours)
(Settings > General > Accessibility > Bold Text)
I use these options to help items on the screen stand out more clearly, by making them a bit more distinctive against the background.
Speak Selection & Speak Screen
(Settings > General > Accessibility > Speech)
This isn’t VoiceOver, which is a completely different feature that I don’t use. VoiceOver basically speaks everything on the screen to you and gives special gestures for navigating the touchscreen. It means people with severe sight loss or complete blindness can still use the device like everyone else. So it’s a very cool and hugely important feature.
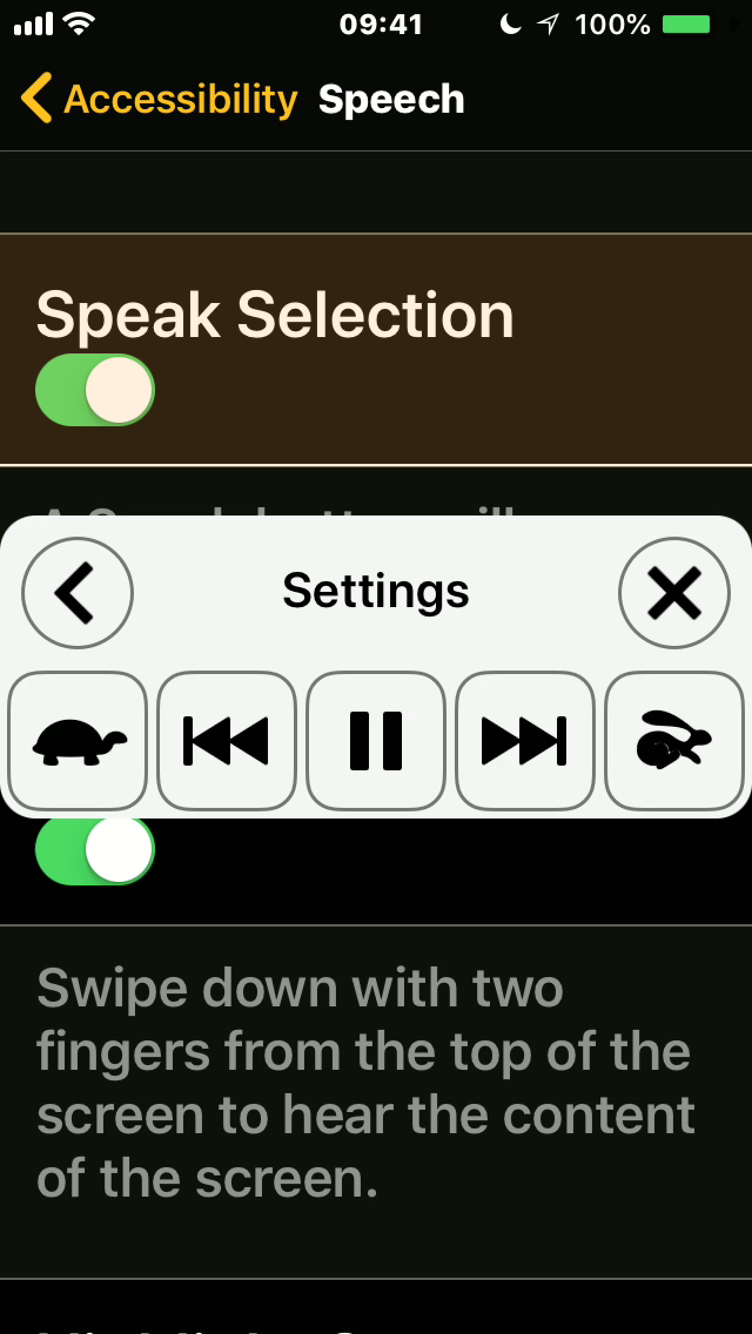
I can see well enough not to use VoiceOver. However, it is still useful to have things on the screen spoken to me sometimes, especially if there’s a lot of text on the screen or it’s very poorly contrasted against its background. So that’s why I have these 2 options enabled.
Speak Selection means that if I highlight text in an app, the pop-up menu will have an additional Speak option, in addition to Cut, Copy, etc. So clicking Speak reads the selected text to me. And if I want to hear everything on the screen, such as a long article, then the Speak Screen option means all I have to do is swipe down from the top of the screen with 2 fingers, and everything will be read out.
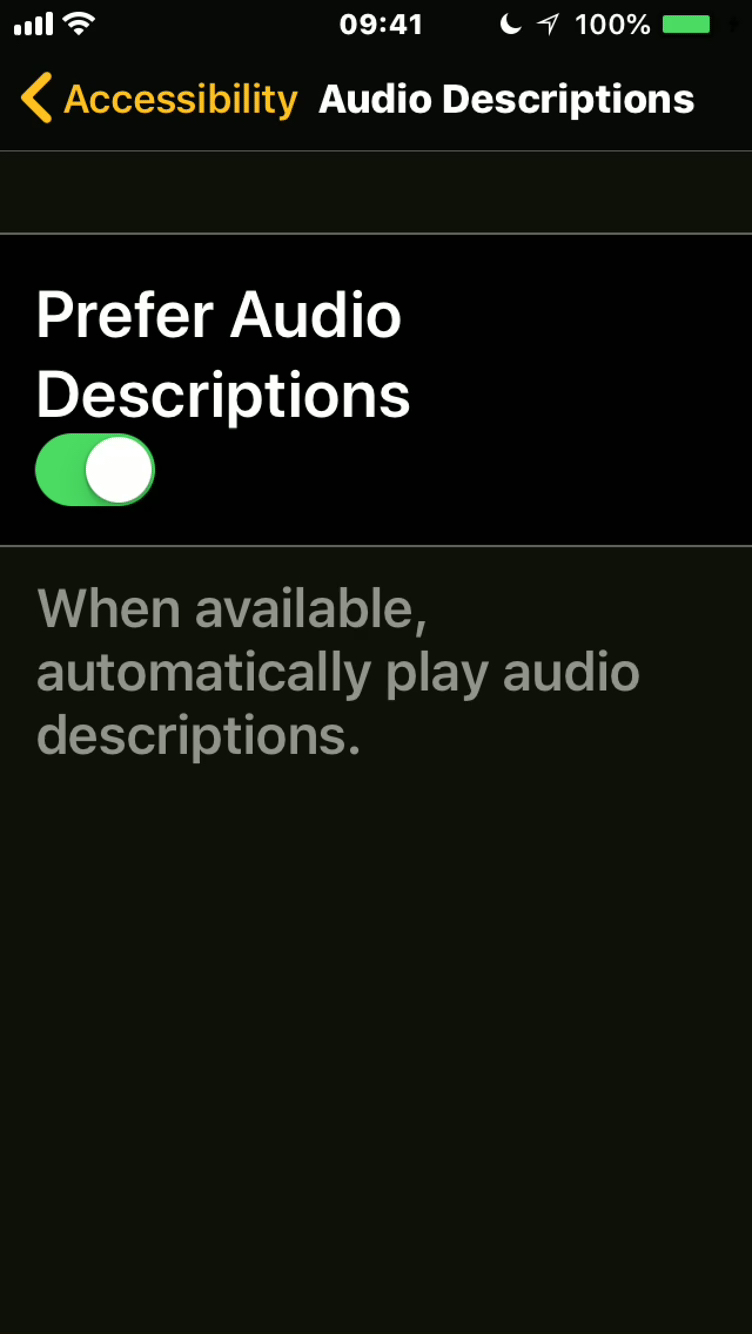
Audio Descriptions
(Settings > General > Accessibility > Audio Descriptions)
As discussed in my previous post and elsewhere in this blog, having audio description can be very useful. It’s rare that I watch videos on my phone given the screen size, unless it’s something that’s mainly speech I can listen to, or I want to look at something relatively short. But just in case I do watch any media that has the action described, I have this option turned on to hear it automatically. This option will only affect videos you watch in the Videos app, and content downloaded from the iTunes store. It won’t turn it on for third party apps like BBC iPlayer, Netflix, etc, as they have their own settings for audio description already.
Incidentally, the RNIB have just launched an audio description campaign, so if you want to find out more about it and its benefits, do go and check that out.
Siri
(Settings > Siri & Search)
(Settings > Accessibility > Siri)
Siri is the voice assistant for Apple products that everybody knows about, so its settings are under the main Settings menu. You talk to Siri with any queries or commands, and it responds with speech as well. There are some additional options for Siri in Accessibility as well though, including the ability to type to Siri rather than talk. I don’t need to use Siri a lot, but it does come in handy sometimes.
Dictation
Dictation is useful for speeding up typing, as it’s not always easy to type on a touchscreen. So by tapping the microphone icon on the bottom row of the on-screen keyboard, I can say what I want to type, and the phone will translate my words into text. It’s pretty accurate as well – not perfect, but good enough to save me time, as all I have to do then is make any small corrections afterwards.
Favourite Apps
I’m not going to list every app I have, I’m just going to discuss my favourites that I use a lot. However, I do also have a list of all my apps, which I’ll try and keep up to date as things change, if you’re interested in knowing what I have.
Social Media
Twitter is my favourite social media app, because it allows me to keep up to date with things and it’s very accessible.
I use it in Night Mode, because it inverts the colours, placing white text on a dark blue background, making it really easy to read. And thankfully the Smart Invert feature on the iPhone recognises this, so it doesn’t flip it the other way round. You can quickly turn on Night Mode by clicking your profile picture in the corner, and then tapping the crescent moon icon at the very bottom of the menu.
And in the Settings & Privacy menu in the Twitter mobile app, there are various options that I like. In the Display & Sound section, I’ve set the text size there to the largest it can be, as Twitter uses its own text settings rather than the Dynamic Type I mentioned in the main iPhone settings earlier.
Then under Accessibility, I’ve turned on Compose Image Descriptions, which means every time I upload an image, I can type a description that blind people will hear spoken to them through their screen readers. So everyone should turn that on as a bare minimum, because image descriptions are very important, and it would be great if it were turned on by default really.
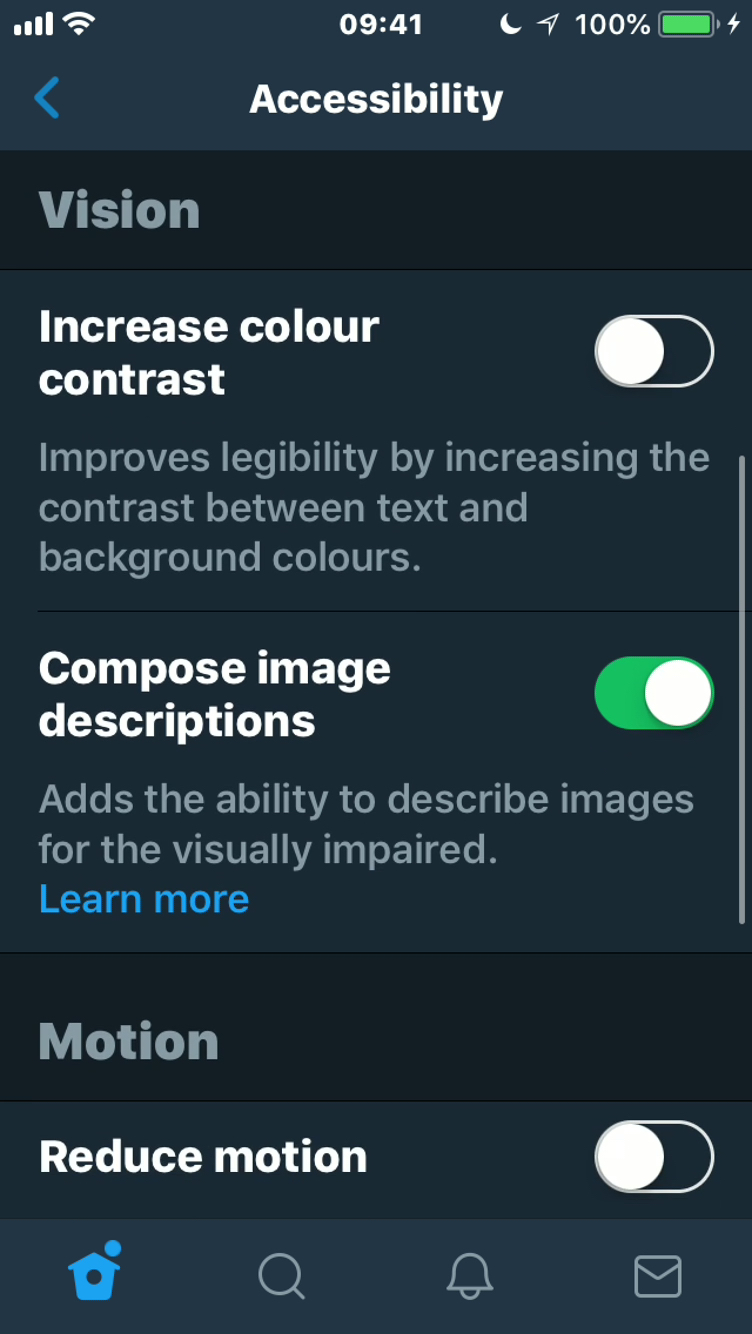
There is also an option under Accessibility to Open Links in Reader View, which means when you open a weblink, it will load a much simplified version of the page’s text, with no graphics in the way or anything like that. And you can adjust the font, font size and colours in that view to make it easier to read. So that’s quite useful, as a lot of web pages are very cluttered otherwise.
In terms of other social media apps, I also have Facebook and Messenger for keeping in touch with friends, plus Instagram and Layout for photos, and Skype, Facetime and WhatsApp. I don’t like the way Microsoft updated the Skype interface a little while back, as it’s not as pleasing on the eye or as easy to navigate as it used to be. I’d never used WhatsApp at all before, and still only use it a tiny bit now, but it has been useful recently for working on a few bits and pieces with other members of the Aniridia Network. And none of my friends call me on Facetime, as they have other ways to get hold of me, so I’ve never used that.
Travel
I’ve made a whole post before how I plan my journeys using apps, so I don’t need to say too much here.
But Citymapper is my essential go-to app for getting around London, because you just type in a destination, and it will tell you the best ways to get there using the Tube and buses and other options. It will even take into account line closures caused by engineering works or other delays, giving you alternate routes accordingly.
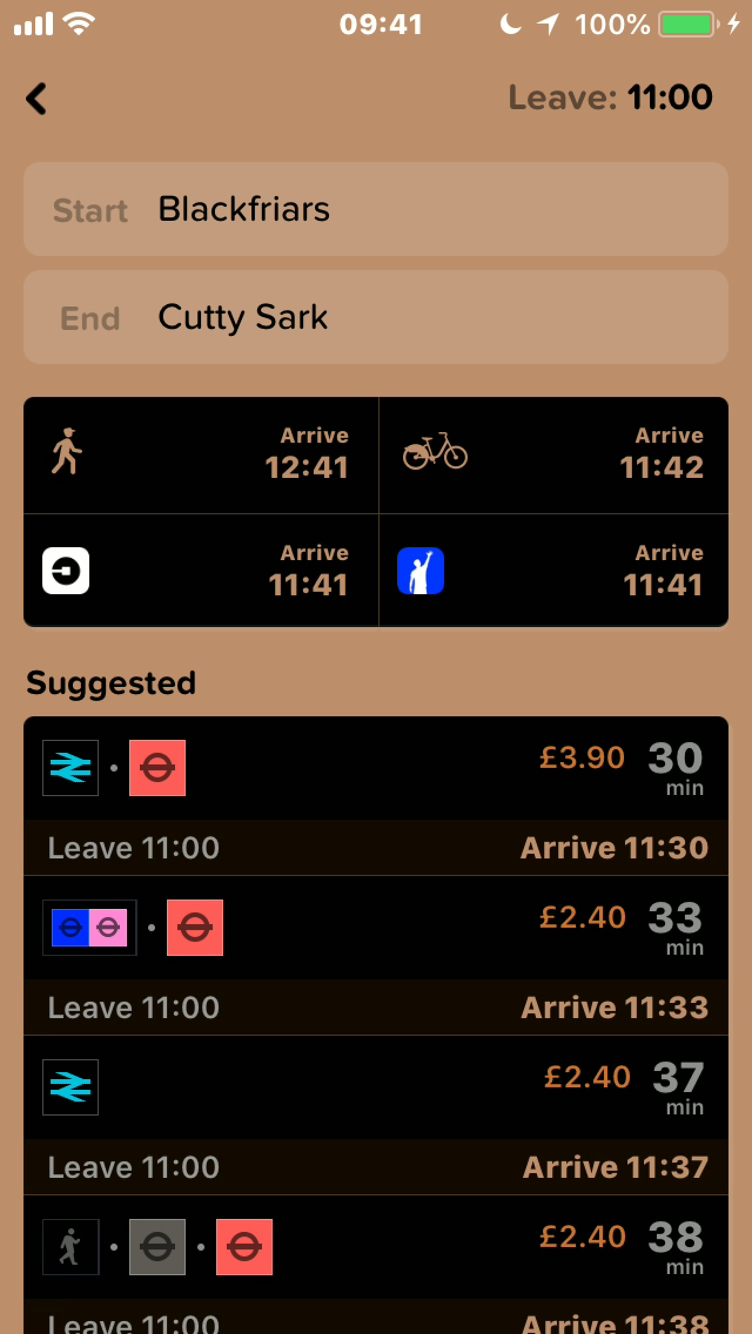
So it’s really useful for visiting new places, and for finding the best way home after I’ve been out as well. You can also track buses on it, so you can see where they are on a map and how long it will take them to get to the bus stop. And it has maps for the Tube, Rail & Night Tube services in the city. So it’s very comprehensive, and it’s also available for various other cities around the UK and the rest of the world.
Google Street View is then really useful for planning the walking parts of my journey, e.g. getting from a Tube station to my final destination. I can virtually walk the route in advance without leaving the house, getting a feel for where I need to go, what landmarks to look out for, etc, so I can then confidently walk to my destination when I get there later. I usually do this on my iMac desktop computer with its big screen, but I also use the app on my phone sometimes too.
I also have Google Maps and Apple Maps of course – I feel like I prefer Google Maps, because it seems to have more detail and I like the spoken directions it gives you.
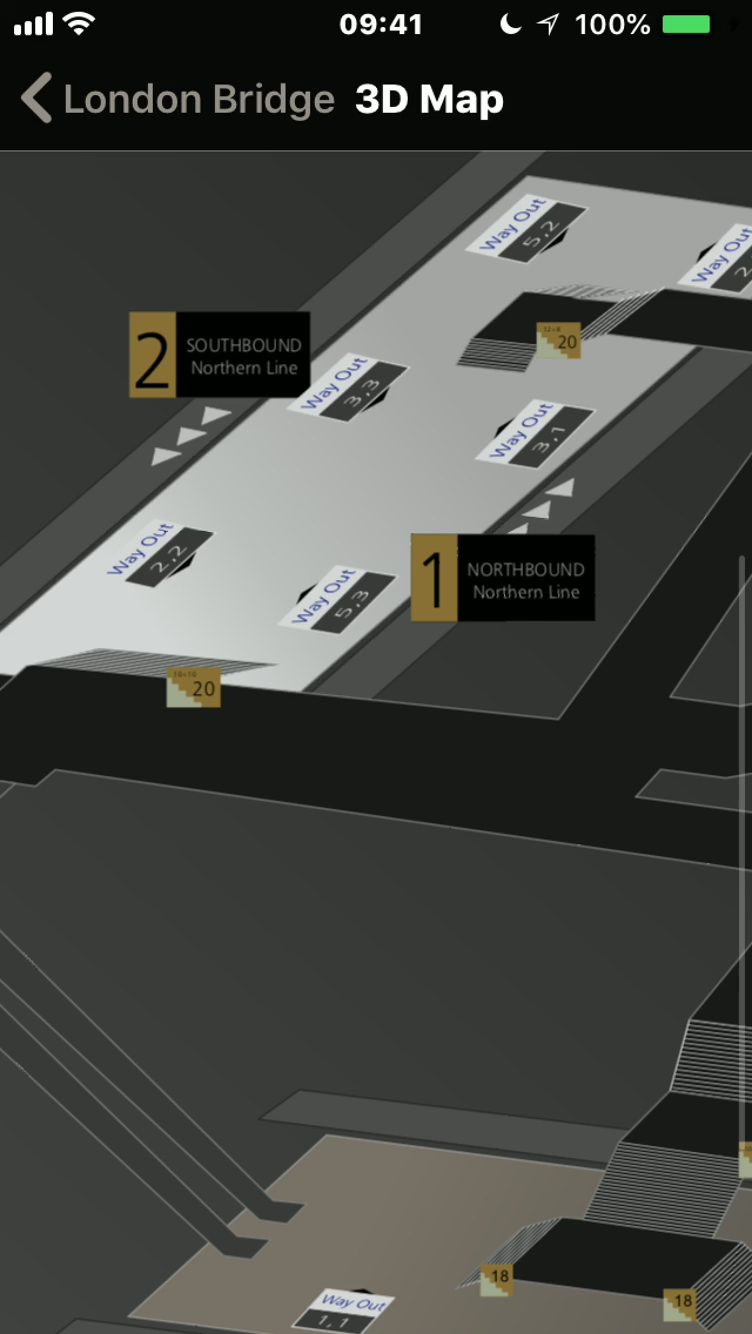
Station Master is also really useful for planning routes within Tube stations themselves. For each station you can bring up a map of its interior and zoom in, to see where all the platforms, escalators, exits, etc are in relation to each other. And you can get other information about each station, including facilities and accessibility features. So it has come in useful, it’s very good.
I also have the Trainline app for booking National Rail train tickets – including mobile e-tickets, allowing you to scan a barcode at the ticket gates. Mobile ticketing isn’t available with all train companies, but where it is used it’s pretty cool. It saves carrying around paper tickets. And I have the National Rail Enquiries app that I can use to plan journeys and check train arrival and departure times.
Perhaps most interestingly, though, I also have the free Soundscape app from Microsoft, which uses 3D audio to assist visually impaired people with navigation. So for instance, if a particular shop is coming up on your left, you’ll hear the name of it in your left ear, or if a road’s coming up on your right, you’ll be told the name in your right ear, and so on. It’s not always going to be 100% perfectly accurate, but it still does a pretty decent job.
However, because it is 3D audio, you need to use earphones for it to work. Some people get concerned about this, because they don’t want to walk down the street with earphones in, just in case they miss other important sounds around them. But you can get bone-conduction earphones to get around this problem, which sit against the bone next to your ear, transmitting the sound through tiny vibrations. So that way your ears are clear, and you can still hear the world around you.
Camera
Obviously I have the standard Camera, Photos and iMovie apps. I don’t use iMovie for video editing on my phone though, I prefer to use the desktop version as I can see it more easily on a nice big screen.
But apart from those, I also have Seeing AI, which is another free Microsoft app for the visually impaired. Using your camera, it can recognise and give speech feedback about all sorts of things, such as reading short items of text and longer documents, recognising products from their barcodes, describing people, recognising faces you’ve told it about, recognising currency, describing scenes that are in front of you, telling you what colour things are, deciphering handwriting, and using differently pitched tones to indicate how bright or dark the light levels are.
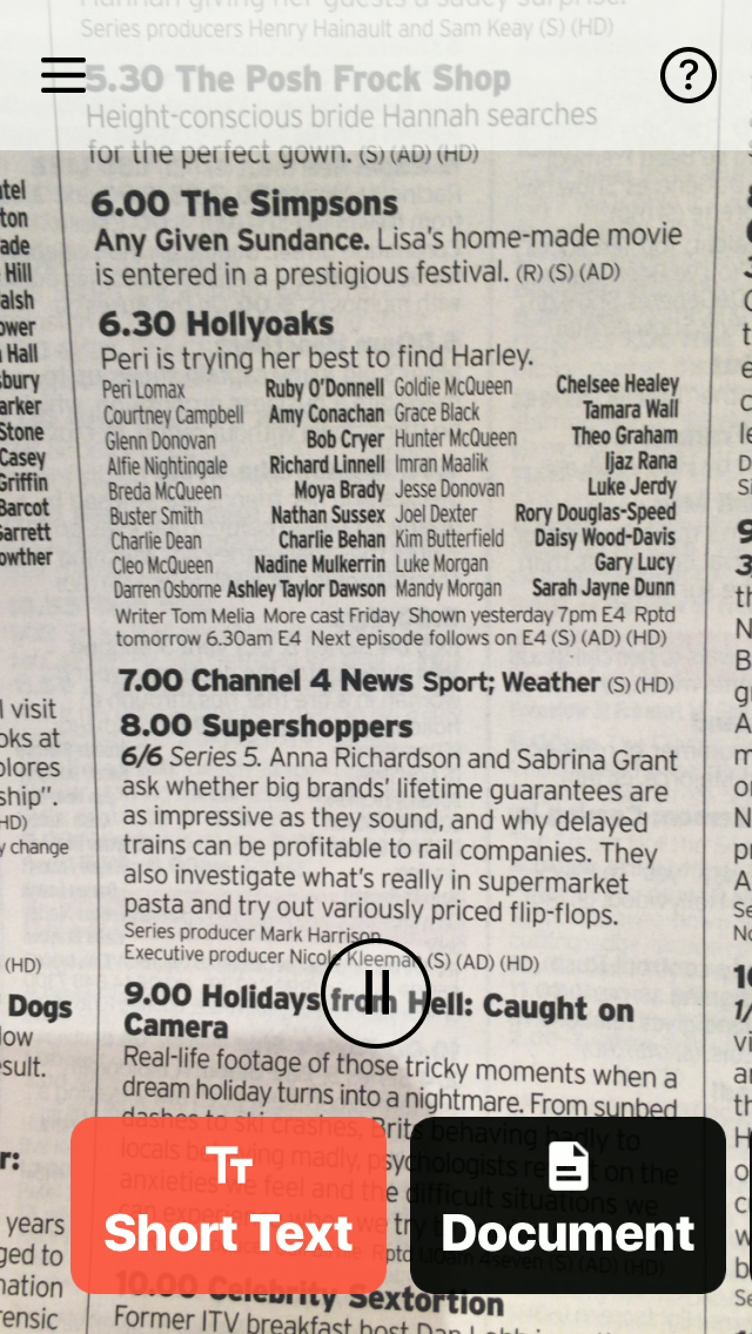
It’s pretty accurate too. It doesn’t always get things exactly right, sure, but often it’s close enough. I personally like it for the text to speech features, whether it be reading documents at home, reading object labels in museums, or whatever. So it does come in handy sometimes.
Update: Just a few days after publishing this post, Microsoft have updated the Seeing AI app, adding the ability to browse and describe photos stored on your phone, optimising performance when recognising photos shared from other apps, and adding availability to 18 more countries, bringing the total up to 70 countries. So that’s great news!
Browse photos on your phone, including hearing descriptions of the objects, people, text, and location. – Optimized performance when recognizing photos shared from other apps. – Now available in 18 more countries.
Another useful app I have is called Rotate & Flip. You can’t get it any more, but other similar apps are available. It just comes in handy when I think I’ve filmed a video in landscape, only to discover that the phone didn’t orientate properly and still thought it was in portrait mode, resulting in a landscape video on its side. So this app rotates it the right way again. Quicktime Player on my desktop iMac can also rotate clips, using the options in the Edit menu, but it’s handy to have an app on the phone that does it too.
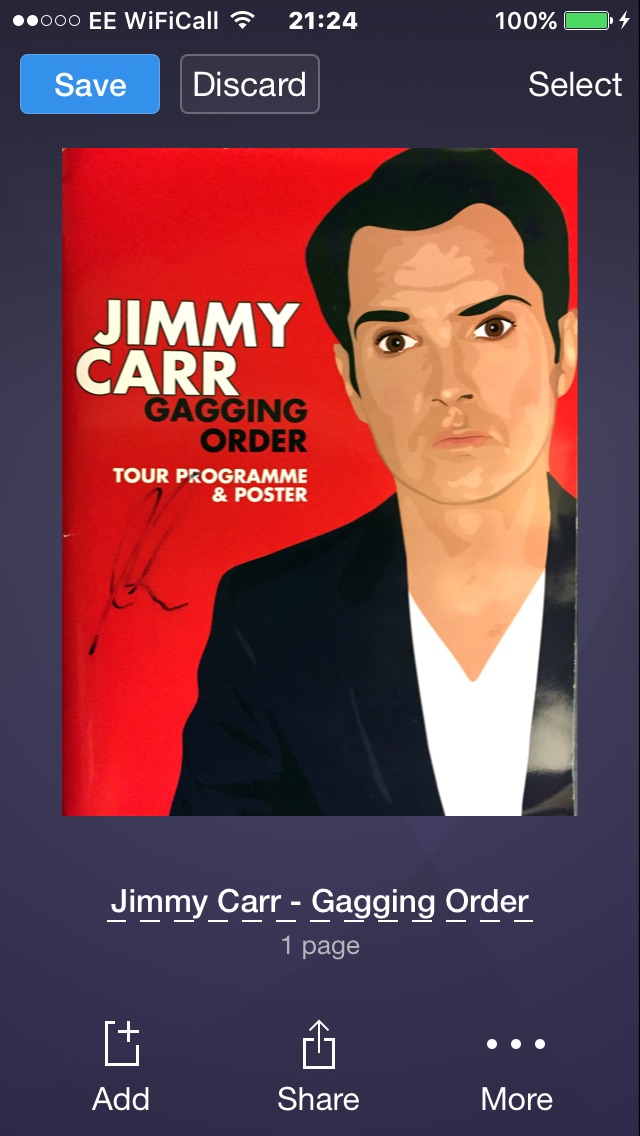
And I also have an app called Scanner Pro, which allows me to scan in documents using my phone’s camera. It’s a very quick process because, as long as the page is against a good contrasting background, the app will automatically detect the page edges, and then scan it and crop it for you. And if it doesn’t get it quite right, or if it can’t detect the edges, you can simply drag the corners to crop the image yourself. If there are multiple pages in a document, then it can create a multi-page PDF as well. And it has OCR text recognition, so you can scan a document and convert it to text, perhaps so your screen reader can speak it to you.
Entertainment
I really enjoy listening to music and radio, so I particularly listen to Podcasts, Amazon Music and BBC iPlayer Radio, which gives me a nice selection, especially during the day when I’m at work as I’m a homeworker.
And I also like listening to audiobooks, so I have the built-in iBooks app for listening to MP3 books imported from my computer, and the Audible app for listening to books from that site.
And if I want some entertainment in the real world, I can also use apps to sign up to social events with groups like Thinking Bob and Meetup. And I also have the Eventbrite app for booking tickets to special events.
Update – Dolphin Computer Access have tweeted me in response to this post, to make me aware of another app that looks interesting, so I may try it out soon:
If you have an RNIB Overdrive account you may want to download our free EasyReader reading app for iOS, as it’s now connected to the Overdrive library and offers an easy to use interface for borrowing, downloading and reading books. If you give it a try, do let us know how you get on.
London
I’ve also got a few London related apps, naturally, being a resident in the city. So I’ve got Time Out and Visit London for information about what’s happening, which can be very useful. I’ve also got the walking tour apps City Visitor Trail and Pocket Guide London at the moment, plus I’ve used others in the past like Cities Talking. And I’ve got the City Toilet Finder app as well, just in case, though to be honest I’m getting quite good at knowing where to pop into for a quick bit of relief if I need it now.
There are some very useful apps for museums and galleries out there as well, and my favourite one I have at the moment is Smartify. It only works with a few specific museums and galleries in London, and a few in Europe and America too. But it’s very cool.
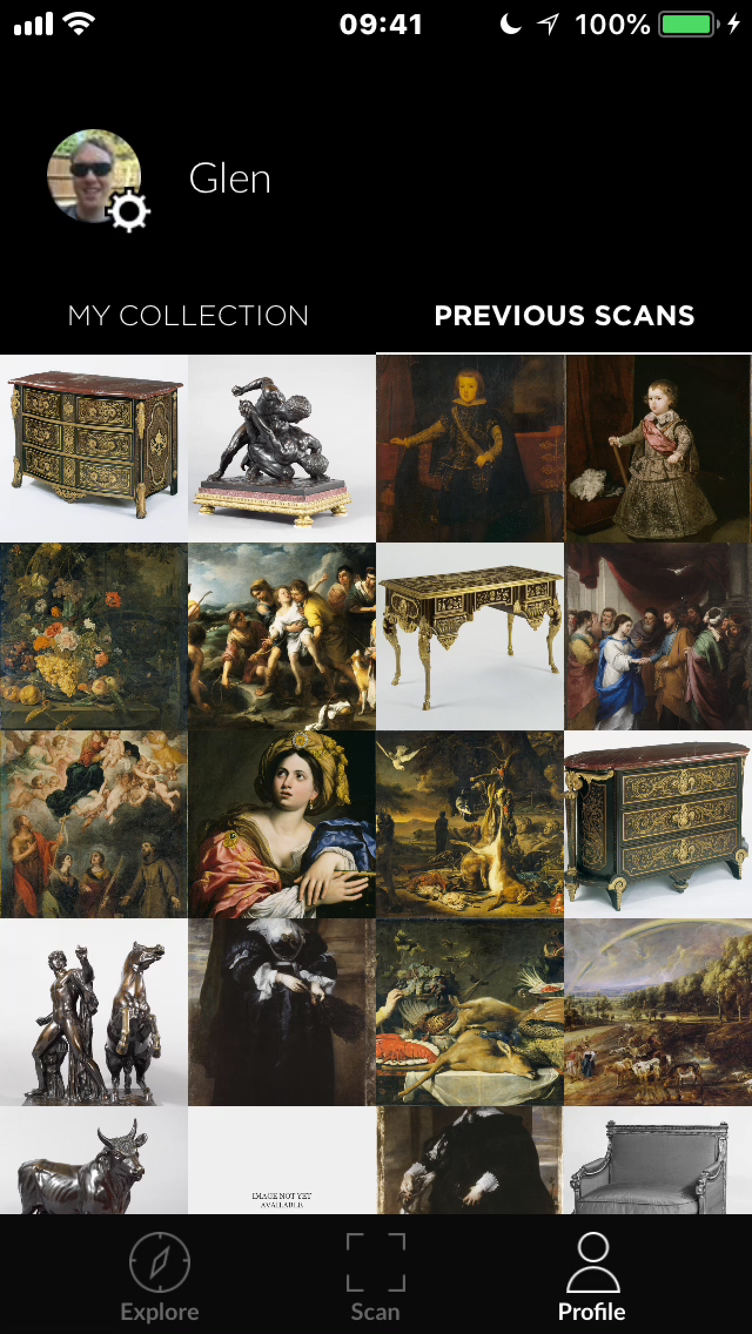
You simply hold the camera up to a painting, sculpture or piece of furniture, and it will instantly bring up information about it. I used it in the Wallace Collection recently and was very impressed (as opposed to the gallery’s audio guide), so I’ll definitely be using it in other galleries too e.g. National Gallery and National Portrait Gallery.
The Audio Eyes app for the Science Museum is also worth a shoutout, as it uses Bluetooth tracking to take you round their Information Age gallery and give you audio description for various objects. See my review of the exhibition and the app for more details.
Finance & Shopping
When it comes to money-related things, I have an online banking app, plus Paypal for making payments, the built-in Wallet app that stores my debit card and occasional other cards and tickets, Amazon for shopping, the Premium Bond Prize Checker app to see if I’ve been lucky this month, the Your DPD app for tracking their couriers when a company like Amazon uses DPD for deliveries, and the Wetherspoon app for ordering food and drink in their pubs. I don’t have much to say about them to be honest, but they do all come in useful.
Utilities
I’ve got all sorts of other utilities as well, including the usual ones for organising things that come with the phone.
But when it comes to organisation, I do like an app called IFTTT (If This Then That), because it allows you to automate common tasks.
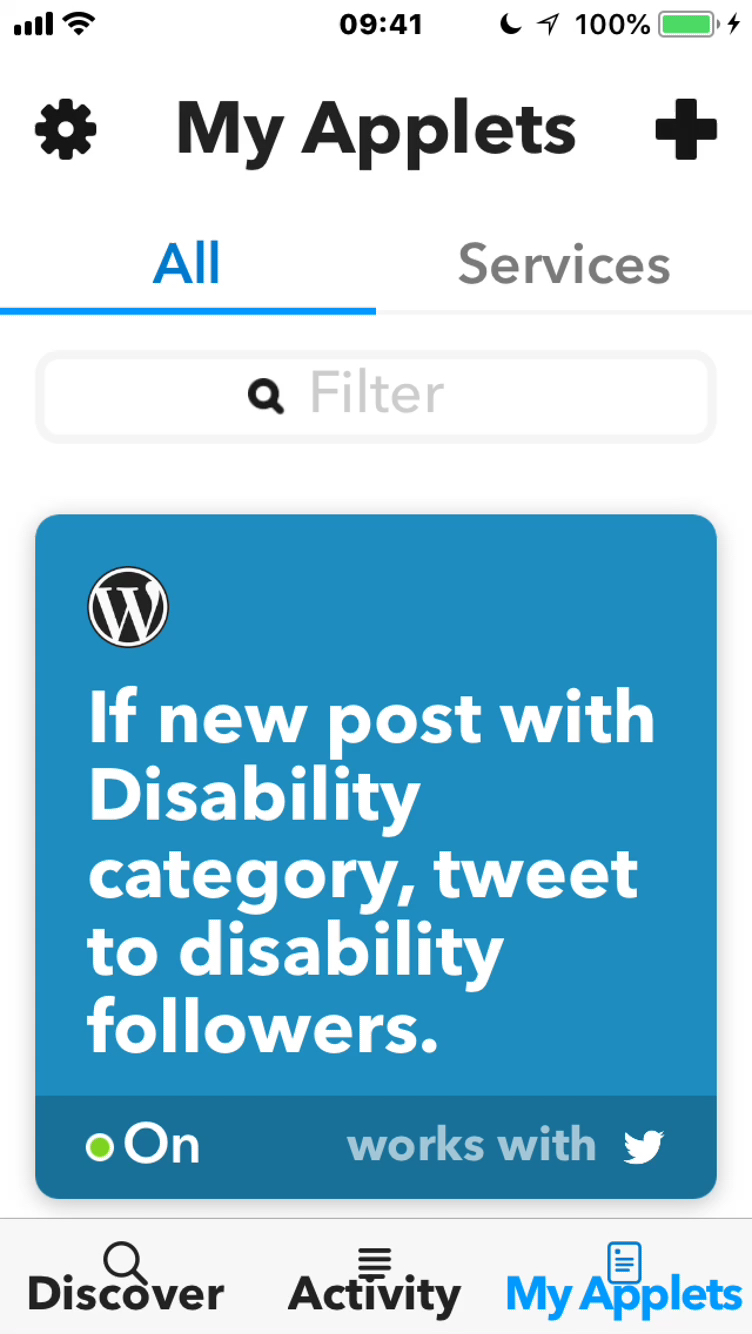
So for instance, I have it set to automatically tweet certain followers whenever I do a blog post with the category Disability. I also have all new blog posts automatically tweeted to certain blog sharing accounts, and I have all new Youtube videos automatically shared to Facebook. Once you get used to it, the applets, as they’re called, are all really easy to set up, and it just makes things a little bit easier.
I also have the Amazon Alexa app for working with our Amazon Echo Dot devices, which is very useful. And I have a Basic Unit Converter app, which will convert weight, height, distance, area, volume and temperature, as that can be very useful.
Health & Medical ID
The very last app I want to mention though is the Health app. I often find it very interesting to look at this when I’ve been out for long walks, to see how far I’ve gone. But more importantly, it also contains a Medical ID feature.
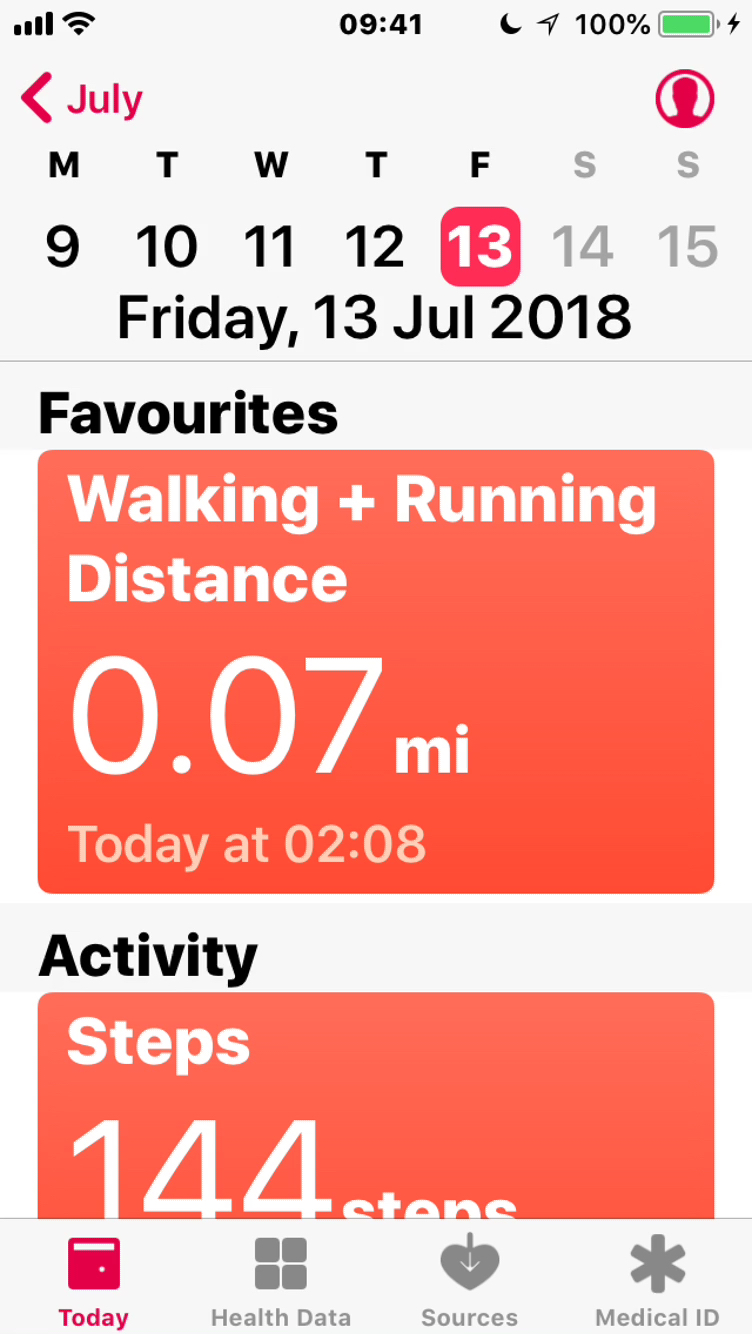
By filling out the Medical ID with your basic details, your disabilities and other important conditions, any special notes that medical staff would need to know, your next of kin details, etc, it allows people to help you more easily in an emergency.
They don’t need to know how to unlock your phone to see this information, that’s the whole point. All they have to do is bring up the keypad where you enter your PIN number, and tap the Emergency link in the bottom left hand corner. The Emergency screen will then allow them to call the emergency services and access your Medical ID information.
So I do strongly encourage you to set up your Medical ID. Hopefully nobody will ever need to access it, but if they ever do, you’ll be glad it was there.
Conclusion
So there you have it. That was another epic post I know, so well done and thank you if you’ve made it all the way through! I just felt it best to be comprehensive. Do feel free to let me know if there are any apps you recommend I should check out. And, as I said earlier, you can check out my current full list of features and apps at any time, which I’ll edit when the operating system and apps get updated.
If you want some more ideas for apps, I can also recommend a recent video by Fashioneyesta (Apps That Make My Life Easier) and a post by The VI Critic (Apps For The Visually Impaired). I also have a list of Sight Loss Resources you might want to check out, and an Assistive Technology playlist on my Youtube channel with videos that I recommend.
Finally, don’t forget to check out the previous post about My Visual Impairment Aids & Gadgets if you haven’t seen that already. Thank you again to everybody who gave such a lovely reaction to that post, and I hope you found this one interesting too!


Hi Glen, great blog post as usual! Thanks for sharing your list of useful apps and accessibility features on your smartphone. I’ll definitely be sharing this post with our social media followers.
LikeLiked by 1 person
Thanks so much, I’m glad you liked it! 🙂
LikeLike
I know a lot of these apps and features, but I learned something new from this post. I use a mix of VoiceOver and the magnification features, so it’s great to see all these features for low vision users explained. Thanks for the section on London Apps, I love London and the apps will come in handy for my next visit. I used to have IFFT, but never really figgured it out. Could you write a post about how to use it? E.G. how do you tweet specific followers and accounts. Thanks. Tina
LikeLiked by 1 person
Thanks Tina, I’m glad you found it useful! IFTTT’s still relatively new to me, I’m probably not making as much use of it as I could. But I can certainly do a post on it, I’ll have a look at that soon. 🙂
LikeLike
Another great post! I never knew about the smart invert colour before. I’ve updated my IOS and now have it on and its great. So much easier to view pictures and videos without switching.
Also I think it should be good to mention the controller on zoom. I use it because i cannot use three fingers to scroll. If you go to Accessibility > Zoom > Show Controller then a circle with a dot and four arrows will appear that you can control around the screen. Plus if you press it, it will come up with menu options to zoom in/out, full screen or window view, choose filters, hide controller and change the zoom level.
Another accessibility feature which is also good to mention is Assistive touch. It helps people who cant access the physical phone buttons and instead do it on a menu on the screen (eg home button, volume, lock screen etc)
LikeLiked by 1 person
Thanks! 🙂 I’ve added an update in the post to include your comments, that’s useful for people to know. I did actually mention the controller in my original video recording, but cut it out in the edit, along with other bits and pieces, to get it down to half an hour, as it’s not a feature I personally make use of. It would be easy to spend hours going through all the features Apple give you, it’s amazing how much there is!
LikeLike
Reblogged this on Rock For Disability.
LikeLiked by 1 person